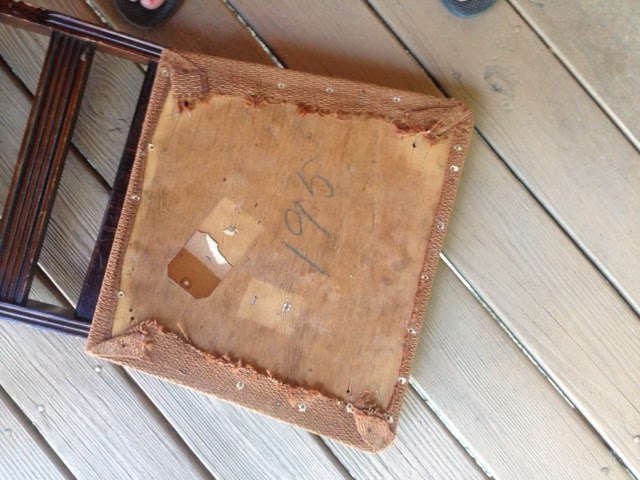
1. Locate your furniture. Make sure it is REAL wood, not laminate. You will be in for a rude awakening once you start refinishing it! Here was my befores of the vintage set I got from a friend:
 |
| Chairs were dingy but great (real) wood structures to work with |
 |
| The table had a cherry stain which I hated, this was during sanding... |
 |
| Underneath the checkered fabric I found the original fabric that had never been taken off |
Supplies:
Batting for seats
Spray Primer
Sander
Paintbrush (Two types: One large for Stain on table and small for chairs)
Paint- I used Semigloss oil-based enamel since I knew food might get on the chairs and you can easily wipe down
Here is the part that I HIGHLY say to skip..which I didn't. I bought chemical stripper and thought it would be easier than sanding all of the old stain off the chairs. I WAS WRONG. Here was during stripping:
Not only did I feel my skin peeling off (not really but it felt like it was with the tiniest amount on my skin even though I was completely covered head to toe in clothes). I'm pretty sure if I get cancer later in life the doctors will attribute this very moment as the reason for it. It did as it said it would but it was NOT worth the trouble. The stain bubbled up and I had to end up sanding every square inch of each leg anyway just to get this bubbled up stain off. The whole reason for it was so I didn't have to sand! That stuff just scares me to death now. Never again! I didn't get a picture of this process because I was worried more about my health than chairs at this point. I stopped the project for a week and had to regroup...
After my mere breakdown I got back to it. I got the sander out and took it to the large part of the chairs and the table. I got sandpaper and a steel wool pad for the small parts of the chairs and did by hand. I would do a chair a day for my own sanity's sake. It was coming together, although the furniture looked pretty pitiful at this point. This is by far the WORST part of the project but you have to stay patient, it's the most critical part.
After all the chairs were smooth and removed of any stain I took spray primer to them and did a very light coat. Here is one:
 |
| I had to move inside because it was so humid. How about Emma overseeing the project behind me? |
The finished product was well worth it. I didn't get process photos of the table because it wasn't nearly as involved. Sand, stain, done. I stained the table a dark espresso. I also didn't get my process of recovering the chairs but here is a great tutorial that I followed. I got three yards of fabric at fabric.com. It was very straightforward and impossible to screw up. The only advice I would give is to make sure your pattern is the right way on all the chairs. I stapled and flipped over a few times to realize I did my chevron pattern backwards and had to redo:/
After:
 |
| Individual chair |
 |
| Up close of the seats |
I swore off ever tackling a dining room set again but I'm so happy with the results. Stay patient and don't beat yourself up if you totally drop the project for a week or two. It's better to do that than to rush through it.
Good luck!


VeRy nice, Rachel!! I LoVe the finished product! And your narrative ...I chuckled all the way through :)
ReplyDeleteThis comment has been removed by a blog administrator.
ReplyDelete