Monday, July 29, 2013

DIY: How to Refinish a Dining Room Table

I have been wanting to replace my small dining room table with something that can accommodate a growing family in the future, so I decided to tackle refinishing a vintage 1930's dining set. Here are the steps I used, with photos, to help you NOT make the mistakes I did.

1. Locate your furniture. Make sure it is REAL wood, not laminate. You will be in for a rude awakening once you start refinishing it! Here was my befores of the vintage set I got from a friend:

Chairs were dingy but great (real) wood structures to work with

The table had a cherry stain which I hated, this was during sanding...

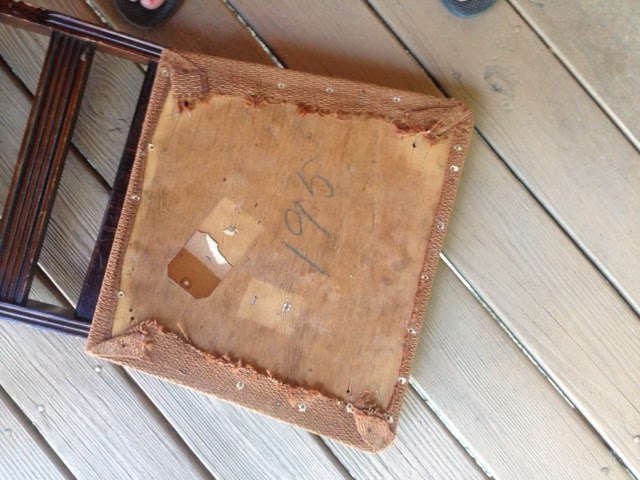
Underneath the checkered fabric I found the original fabric that had never been taken off
Once I got down to the bones of the furniture I found a few surprises. It looked like there had been multiple stain colors used over the years and the seats had the original fabric underneath the checkered blue fabric. The good thing was that the actual wood for the seats were in great shape so I was able to keep it.

Supplies:

Batting for seats
Spray Primer
Sander
Paintbrush (Two types: One large for Stain on table and small for chairs)
Paint- I used Semigloss oil-based enamel since I knew food might get on the chairs and you can easily wipe down

Here is the part that I HIGHLY say to skip..which I didn't. I bought chemical stripper and thought it would be easier than sanding all of the old stain off the chairs. I WAS WRONG. Here was during stripping:


Not only did I feel my skin peeling off (not really but it felt like it was with the tiniest amount on my skin even though I was completely covered head to toe in clothes). I'm pretty sure if I get cancer later in life the doctors will attribute this very moment as the reason for it. It did as it said it would but it was NOT worth the trouble. The stain bubbled up and I had to end up sanding every square inch of each leg anyway just to get this bubbled up stain off. The whole reason for it was so I didn't have to sand! That stuff just scares me to death now. Never again! I didn't get a picture of this process because I was worried more about my health than chairs at this point. I stopped the project for a week and had to regroup...

After my mere breakdown I got back to it. I got the sander out and took it to the large part of the chairs and the table. I got sandpaper and a steel wool pad for the small parts of the chairs and did by hand. I would do a chair a day for my own sanity's sake. It was coming together, although the furniture looked pretty pitiful at this point. This is by far the WORST part of the project but you have to stay patient, it's the most critical part.

After all the chairs were smooth and removed of any stain I took spray primer to them and did a very light coat. Here is one:

I had to move inside because it was so humid. How about Emma overseeing the project behind me?
After spraying each chair with one coat of primer I painted and thin coat of enamel paint on them each day. I did a total of three coats on each. This worked my nerves as well because there are so many tiny parts to these chairs and I felt like I was never going to finish!

The finished product was well worth it. I didn't get process photos of the table because it wasn't nearly as involved. Sand, stain, done. I stained the table a dark espresso. I also didn't get my process of recovering the chairs but here is a great tutorial that I followed. I got three yards of fabric at fabric.com. It was very straightforward and impossible to screw up. The only advice I would give is to make sure your pattern is the right way on all the chairs. I stapled and flipped over a few times to realize I did my chevron pattern backwards and had to redo:/

After:


Individual chair

Up close of the seats

I swore off ever tackling a dining room set again but I'm so happy with the results. Stay patient and don't beat yourself up if you totally drop the project for a week or two. It's better to do that than to rush through it.

Good luck!

Friday, May 10, 2013

Spring, it's heavenly!

It's official, it's spring! And here in the deep south it's already feeling like the dog days of summer. I definitely am NOT looking forward to the 100+ degree temps but I can't lie, I'm loving the weather now.

Josh and I planted an organic garden recently and it's taking off! I'm looking forward to having some fresh veggies in the near future. If you want to stay chemical free look into companion planting, we set up our garden like this and have had ZERO pests in our garden! It's amazing and we have chemical free produce to munch on all season.

Try companion planting for a chemical free and pest free organic garden

We have also enjoyed trying new types of gardening like for example growing pineapples, potatoes and tomatoes from their actual fruit. The tomatoes were actually an accident, they started coming up in our compost from an old tomato!

Left: Pinapple plant, Right: Sweet Potato, Bottom: Tomatoes from compost

Some other oddities around the Wright lake house is none other than LIZARDS. These guys are everywhere down here and I have to admit it took me a while to get used to them hopping around. The great thing is that I have hardly any bugs, which is amazing especially since we live on a huge lake.

These guys stay full and keep the creepy crawly bugs and mosquitoes off of me. I have grown to love them for that reason alone :) Even the ugly one is kinda cute when he sits on the mushroom and listens to the gnome's stories...

 
It's so nice to see everything in bloom, it rejuvenates my soul. I think I have come to realize that heaven in my mind is being surrounded by none other than plants, animals and pretty furniture. Random? Well, it is my heaven not yours :)

Plants...

My little herb garden

These bulbs were from my grandmother, she got them in Mexico

Sunflowers are about to pop..the birds love them!

I heart Hostas.

Our little front patio where we sit and look out over the lake

Animals...
 
Emma and Blue (aka the "kids"). I love how Blue (and his dirty nose) is sleeping standing up. Hard life!

These two go at it every morning on my dock..I have no idea what they are fighting about!
Pretty furniture...

My neighbor recently did a trade with me..I got these two circa 1930's beauties! Above is the bar cabinet

Circa 1930's china curio..gorgeous! Try trading with a friend, you'll be surprised what they want to get rid of!

See how I wrapped all of that up nicely? :) What is your idea of heaven? What would it include?

-Rach

Sunday, January 20, 2013

DIY Shark's Tooth Necklace


I've been walking past our jar of collected shark's teeth for months trying to figure out what to do with them. Well, I didn't figure out what to do with them but rather one of them...a chic necklace! I was going to document the steps but little did I know within a few hours it was complete and I hadn't taken one picture. So give me credit for at least showing you the finished product, bokay?

We go camping on Cumberland Island every year and collect sometimes hundreds of shark's teeth in one visit. My favorite one has always been a very large fossilized tooth from an extinct Hemipristis shark so I decided to use it in my necklace...


Step 1: Find a shark's tooth. (you can always order them online, check Ebay or contact me) It's nearly next to impossible to reproduce so you don't have to worry about being sold a "fake" shark's tooth.

Step 2: Paint the "gum". I used a gold enamel paint that I got at Michaels Arts store. You can tell where the "gum" and tooth starts because of the texture. Also, the enamel won't stick on the slick tooth so don't worry about being perfect. Let dry for a few hours. I put mine in the freezer to speed up the process.

Step 3: Wrap with gold wire (also got this at Michaels). I used this tutorial and tweaked it a little. I liked the look of one wire around each side and NO wire around the middle part. It's easy to undo and redo until you get it to where you like it.

Step 4. Attach to a long chain with needle-nose pliers. Done!

P.S. My apologies about the grainy photo, we don't have our digital camera at the moment so I had to take it with my phone!

Thursday, January 10, 2013

Country Living

Pumpkin picking in a local patch
My canned pickled okra!


Blue LOOOVES the cotton field beside our house (not that you can tell or anything)
Get it HERE


Over the past few months I have been getting used to this new life called living in the middle of NOWHERE. It has had its up's and down's but altogether it has taught me quite a bit. I'm learning things like how to can and preserve food from my sweet 70 something neighbor, what processes it takes to prepare land to be farmed and how to live in a town that still lives off of roadside veggie stands and really lives off of it's own land and agriculture.

Yes, it has been quite a learning experience and with that comes a step back from technology (as you may have noticed) and me being a bit more removed from TV and computer. It has been altogether refreshing. I seriously suggest everyone do it for a bit, just to step back and learn things that you can't get from a web article or TV. You would be amazed at what you get from it. At first you might go through a "guilt" phase just because you feel as if the innerweb needs you (especially if you write a blog or are an avid Facebooker), but once you get past that you really start to see clearly. I definitely had a few weeks of "Are you ok? I just noticed you haven't been posting, tweeting, etc ."(Which in this day I guess means one is clearly unstable or having a secret life crisis??) It is sad, actually.

With this awakening of Josh and my back-to-basics life we have been on this kick of wanting to buy a mini-farm and live more self-sufficiently. If you're wanting to learn how to do anything from keeping a one acre farm to harvesting and storing food to keeping bees to making your own wine I HIGHLY suggest a book we have been reading called The Self-Sufficient Life And How To Live It by John Seymour, it's amazing!
Related Posts Plugin for WordPress, Blogger...